I love Drupal! It ‘s a very powerful CMS, has the support of a huge community, there are thousands of free modules. Features such as CCK, Taxonomy and Views make it an incredible development platform. You can build real web applications without writing a line of code. But unfortunately many people are frightened by the first approach. One of the first issues that it faces a novice Drupal user is the lack of a WYSIWYG HTML editor (what you see is what you get) on the client side in the core installation of the CMS. I had to struggle hard to figure out which combination, of the dozens of editors and modules available, it was the right one. I was hoping that with the release of Drupal 7 an editor was finally built in but was not the case, so I decided to publish this guide (or tutorial if you prefer) to configure Drupal 7 to use the WYSIWYG editor CKEditor, buttons for entering images within articles and photo viewing with a Lightbox script. This is what I think right now the best configuration for Drupal 7, but of course there are dozens of other possibilities.
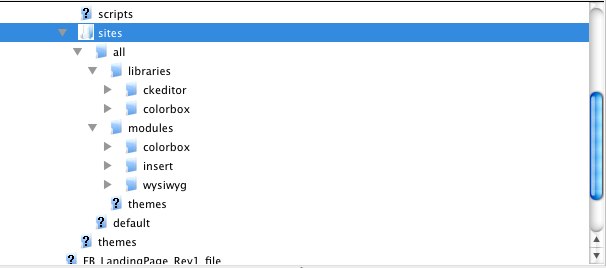
1) Create a folder called “libraries” in the “sites \ all” folder.
2) Download the colorbox (tested with 1.3.17) script at this url.
3) Unzip the Colorbox script and upload it to “sites\all\libraries” folder.
4) Download the CKEditor (tested with 3.6.1) at this url.
5) Unzip CKEditor and upload it to “sites\all\libraries” folder.
6) Download the Drupal 7 version (tested with 1.1) of the Colorbox module.
7) Download the Drupal 7 version (tested with 2.1) of the WYSIWYG module.
8) Download the Drupal 7 version (tested with 1.1) of the Insert module.
9) Unarchive the three modules (Colorbox, WYSIWYG, Insert) and upload them in the “sites\all\modules” folder.
Now your “sites\all” folder must be like this picture.
10) Connect to your site as Administrator and go to the Configuration area.
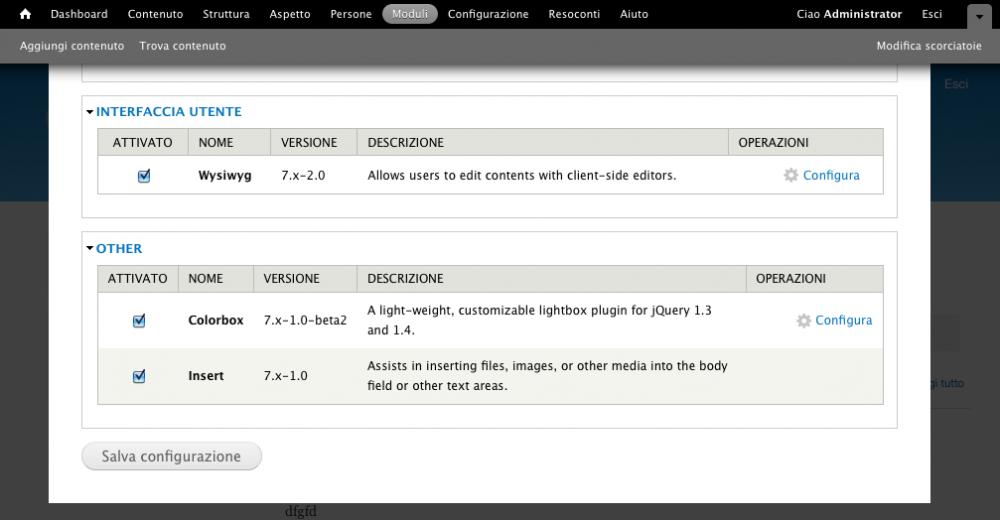
11) Enable Colorbox, WYSIWYG, Insert modules.
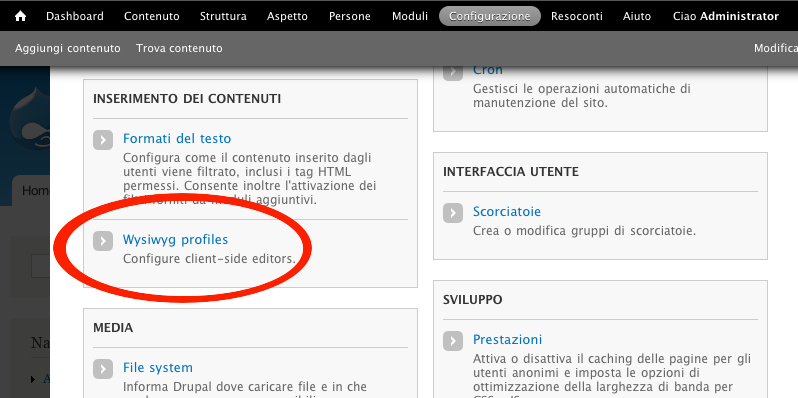
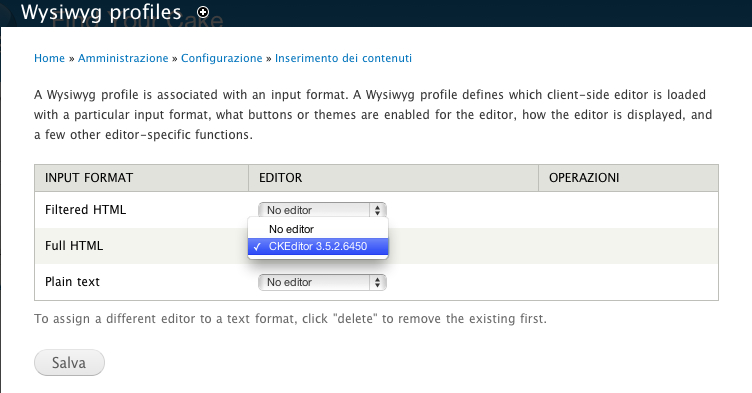
12) Edit the “Wysiwyg profiles”.
13) You need to set CKEditor for the Full HTML profile.
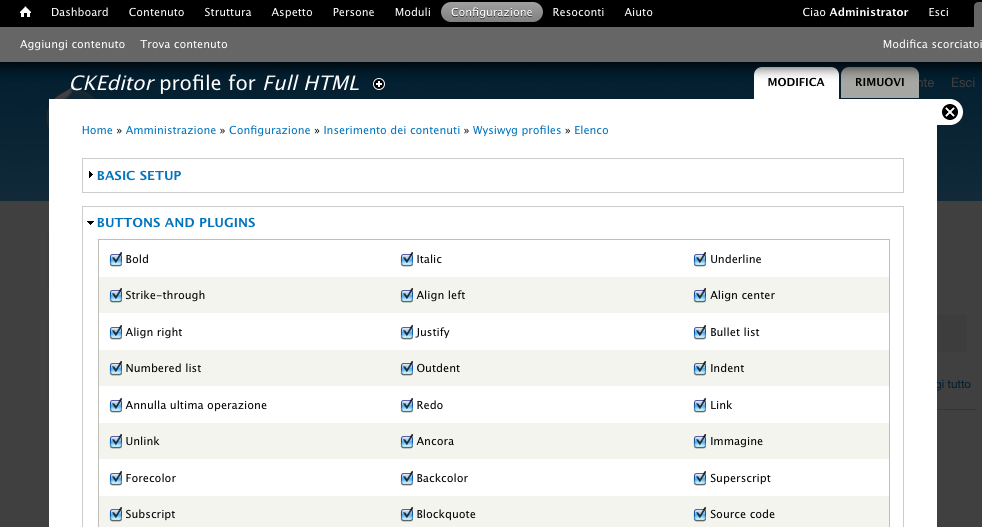
14) Click the Edit button and select all the buttons you want to use on your CKEditor.
15) Edit the Colorbox configuration. Set the Large Image Style.

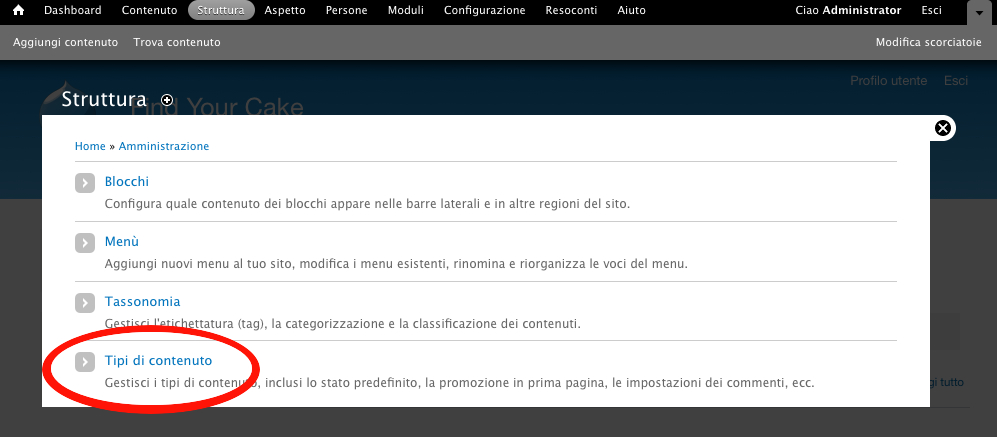
16) Go to the Structure Area and choose Content Types.
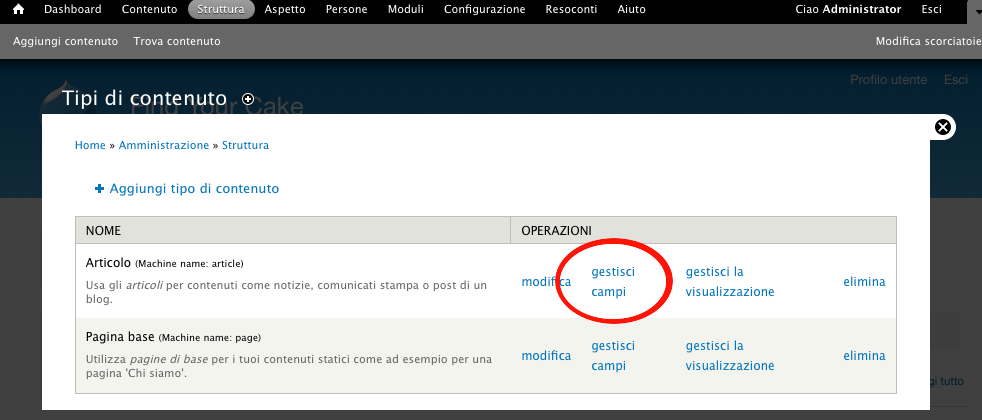
17) Click Manage Fields for the Article content type.
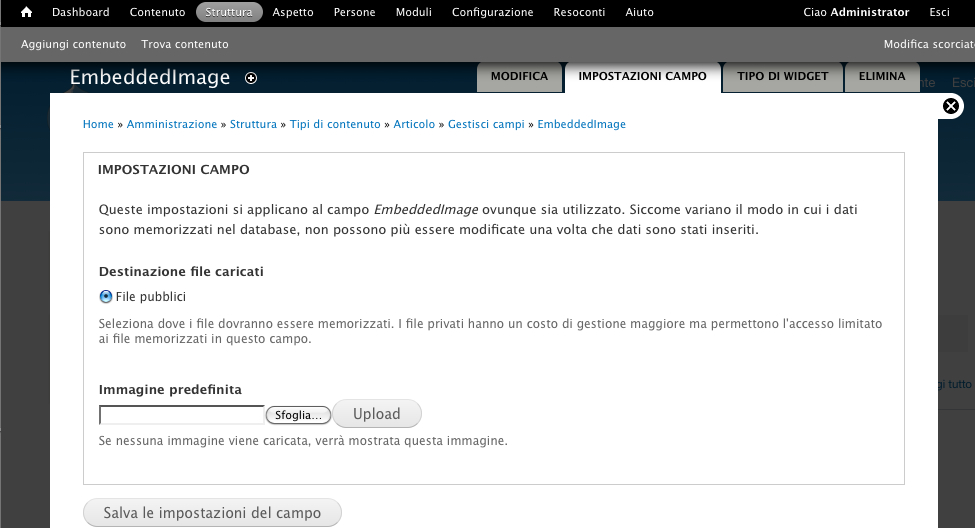
18) Create a new field of type Image and Widget Image
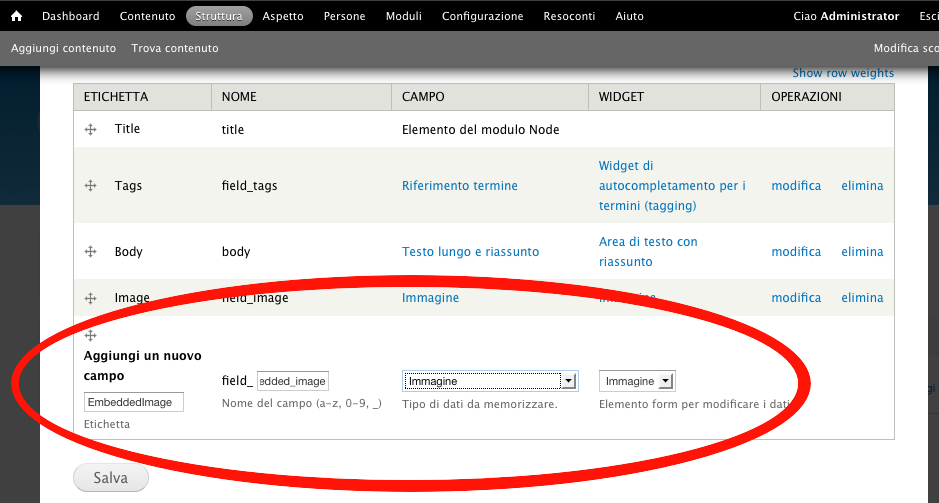
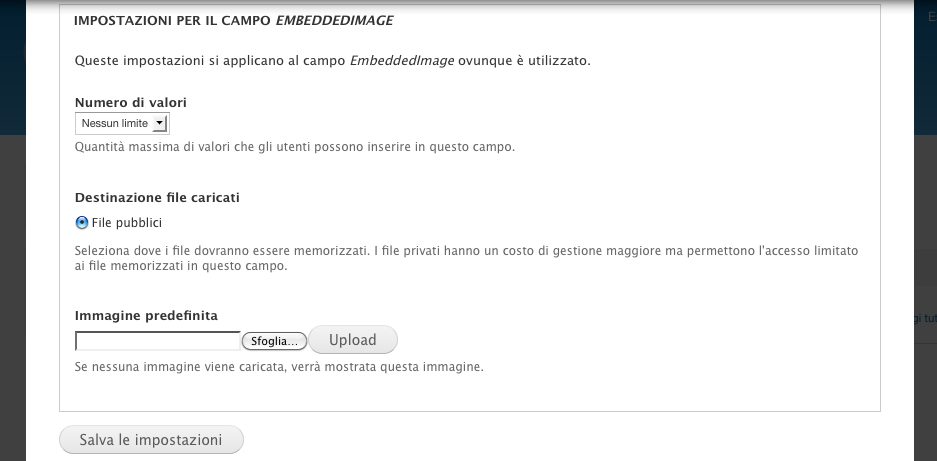
19) In the next form leave all the default settings and save.
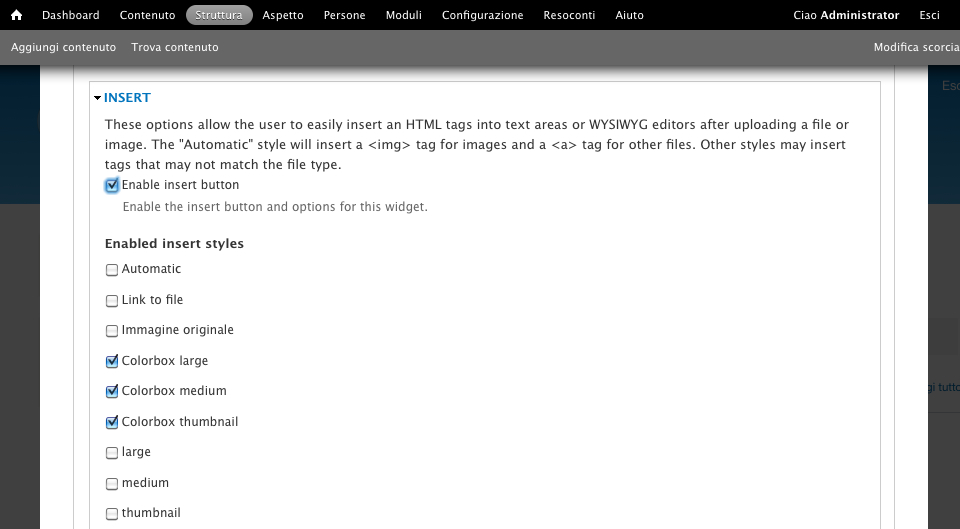
20) In the Insert section select “Enable insert button”, check the “Colorbox thumbnail” checkbox, set Unlimited for the “Number of values” option.
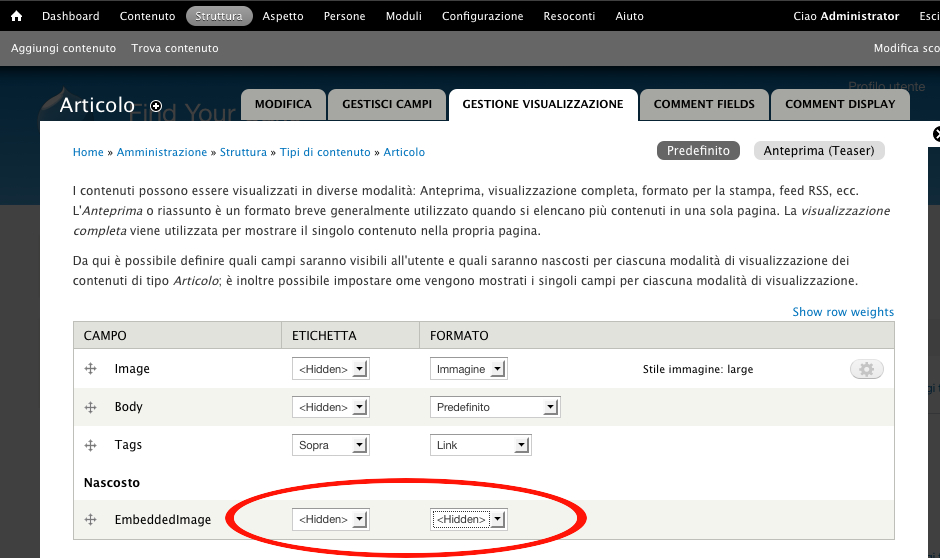
21) In the Manage Display section select “Hidden” for the label and Format of the new field.
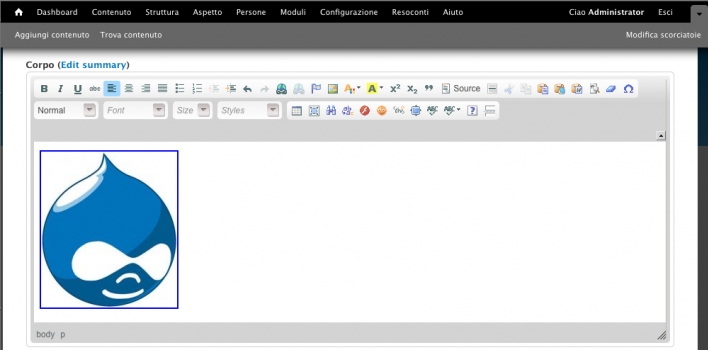
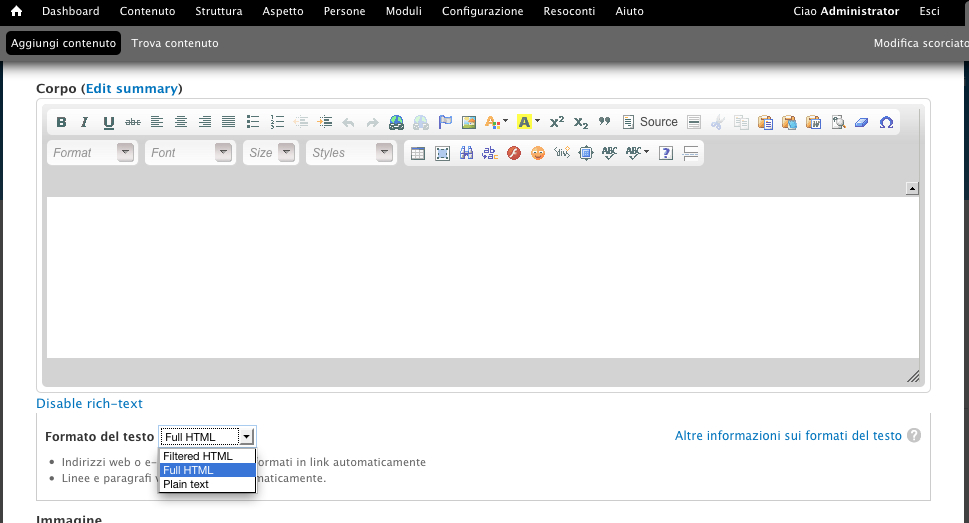
Now when you create an article if you set Full HTML text format you can use the CKEditor.
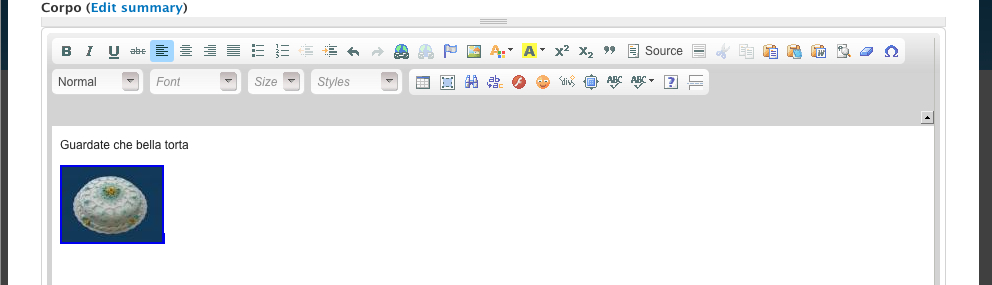
Under the editor you find a “Insert” section where you can upload pictures and then you can insert them on the body.

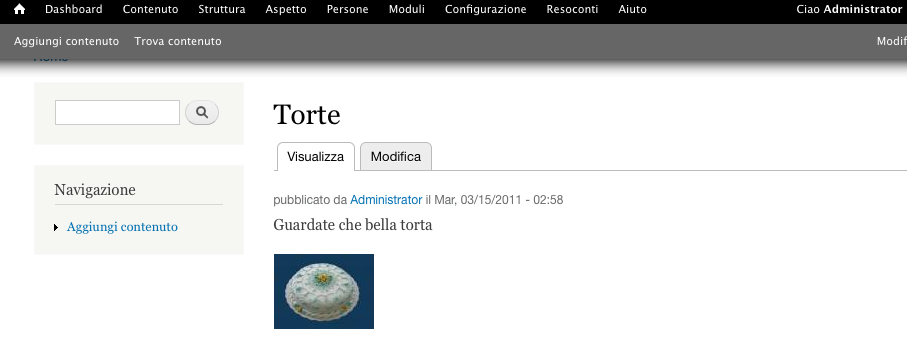
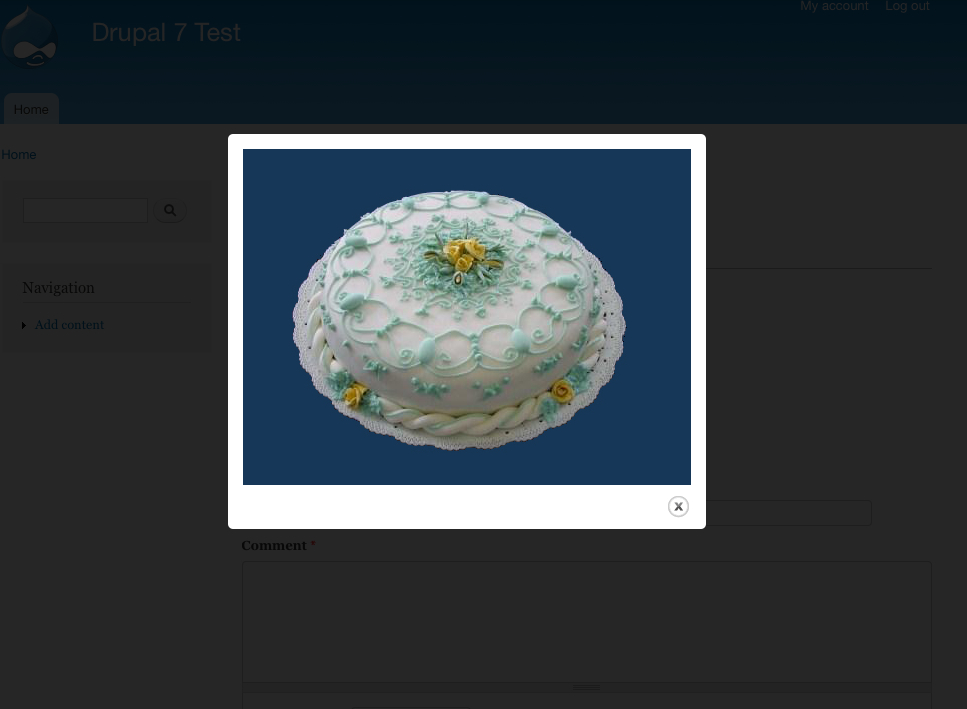
When you click on the thumbnail the picture is displayed with a lightbox effect.
Other interesting modules are Wysiwyg ImageField and Media but they are not yet stable.